
Documentation
Everything you need to know about using our products
Product Exporter Guide
Version 1.1.1, December 2025
This guide covers all sections of the plugin admin interface (WooCommerce → Product Exporter). Each feature indicates availability: Free (free version) or Pro (paid version).
In the Free version, all Pro features are marked with a PRO icon and are unavailable (blurred or hidden).
Table of Contents
Plugin Installation
How to install Product Exporter
Product Exporter is available in two editions: Free (from WordPress.org) and Pro (purchased from badamsoft.com).
Installing the Free version
- Log in to your WordPress admin dashboard.
- Navigate to Plugins → Add New.
- In the search field, type "Product Exporter".
- Locate the plugin by BadamSoft LLC and click Install Now.
- After installation completes, click Activate.
The plugin will appear under WooCommerce → Product Exporter.
Installing the Pro version
- Purchase and download the Pro ZIP file from badamsoft.com.
- In your WordPress dashboard, go to Plugins → Add New → Upload Plugin.
- Click Choose File, select the downloaded ZIP, and click Install Now.
- After installation, click Activate Plugin.
Upon activation, you will be prompted to enter your license key (see License Activation below).
System Requirements
Minimum requirements for running the plugin
To ensure optimal performance and compatibility, Product Exporter requires the following:
- • WordPress: 6.0 or higher
- • WooCommerce: 8.0 or higher
- • PHP: 7.4 or higher (PHP 8.3+ recommended for best performance)
- • MySQL: 5.6 or higher (recommend MySQL 8.0 or greater)
- • MariaDB: 10.1 or higher (recommend MariaDB 10.6 or greater)
- • Memory Limit: At least 256 MB (512 MB recommended for large catalogs >50,000 products)
We strongly recommend PHP 8.3 or greater and MySQL 8.0 or MariaDB 10.6 or greater for improved speed, security, and compatibility with modern WooCommerce features.
The plugin is tested up to WordPress 6.9 and WooCommerce 10.4.2.
License Activation
Activate your license key
License activation is required only for the Pro version and enables automatic updates, priority support, and full access to Pro features.
- After activating the Pro plugin, navigate to WooCommerce → Product Exporter → Settings → License.
- Enter your license key (provided in your purchase confirmation email from badamsoft.com).
- Click Activate License.
Upon successful activation:
- The license status will show as Active.
- Remaining activations and expiration date (if subscription-based) will be displayed.
- Automatic updates will become available via Plugins → Installed Plugins.
Managing Licenses
- Click Manage Domains to view or revoke activations on other sites.
- To deactivate, click Deactivate License (useful when moving to a new domain).
License validation occurs periodically in the background. No personal data is transmitted beyond the license key and site URL.
Updating the Plugin
Keep your plugin up to date
Free Version (WordPress.org)
FreeUpdates are delivered automatically through the standard WordPress update system:
- Go to Dashboard → Updates or Plugins → Installed Plugins.
- If an update is available, click Update Now.
Pro Version
ProAfter license activation, Pro updates are delivered via the Easy Digital Downloads (EDD) Software Licensing system:
- Ensure your license is active (Settings → License).
- Updates appear alongside other plugins in Dashboard → Updates or Plugins → Installed Plugins.
- Click Update Now when available.
Always back up your site before updating. Changelog is available in the plugin's readme.txt and on badamsoft.com.
1. Quick Export — Primary Manual Export Screen
This is the main plugin page where you configure and run product exports. The interface is divided into logical sections for ease of use.
Step 1: Selecting Export Fields (Available Fields)
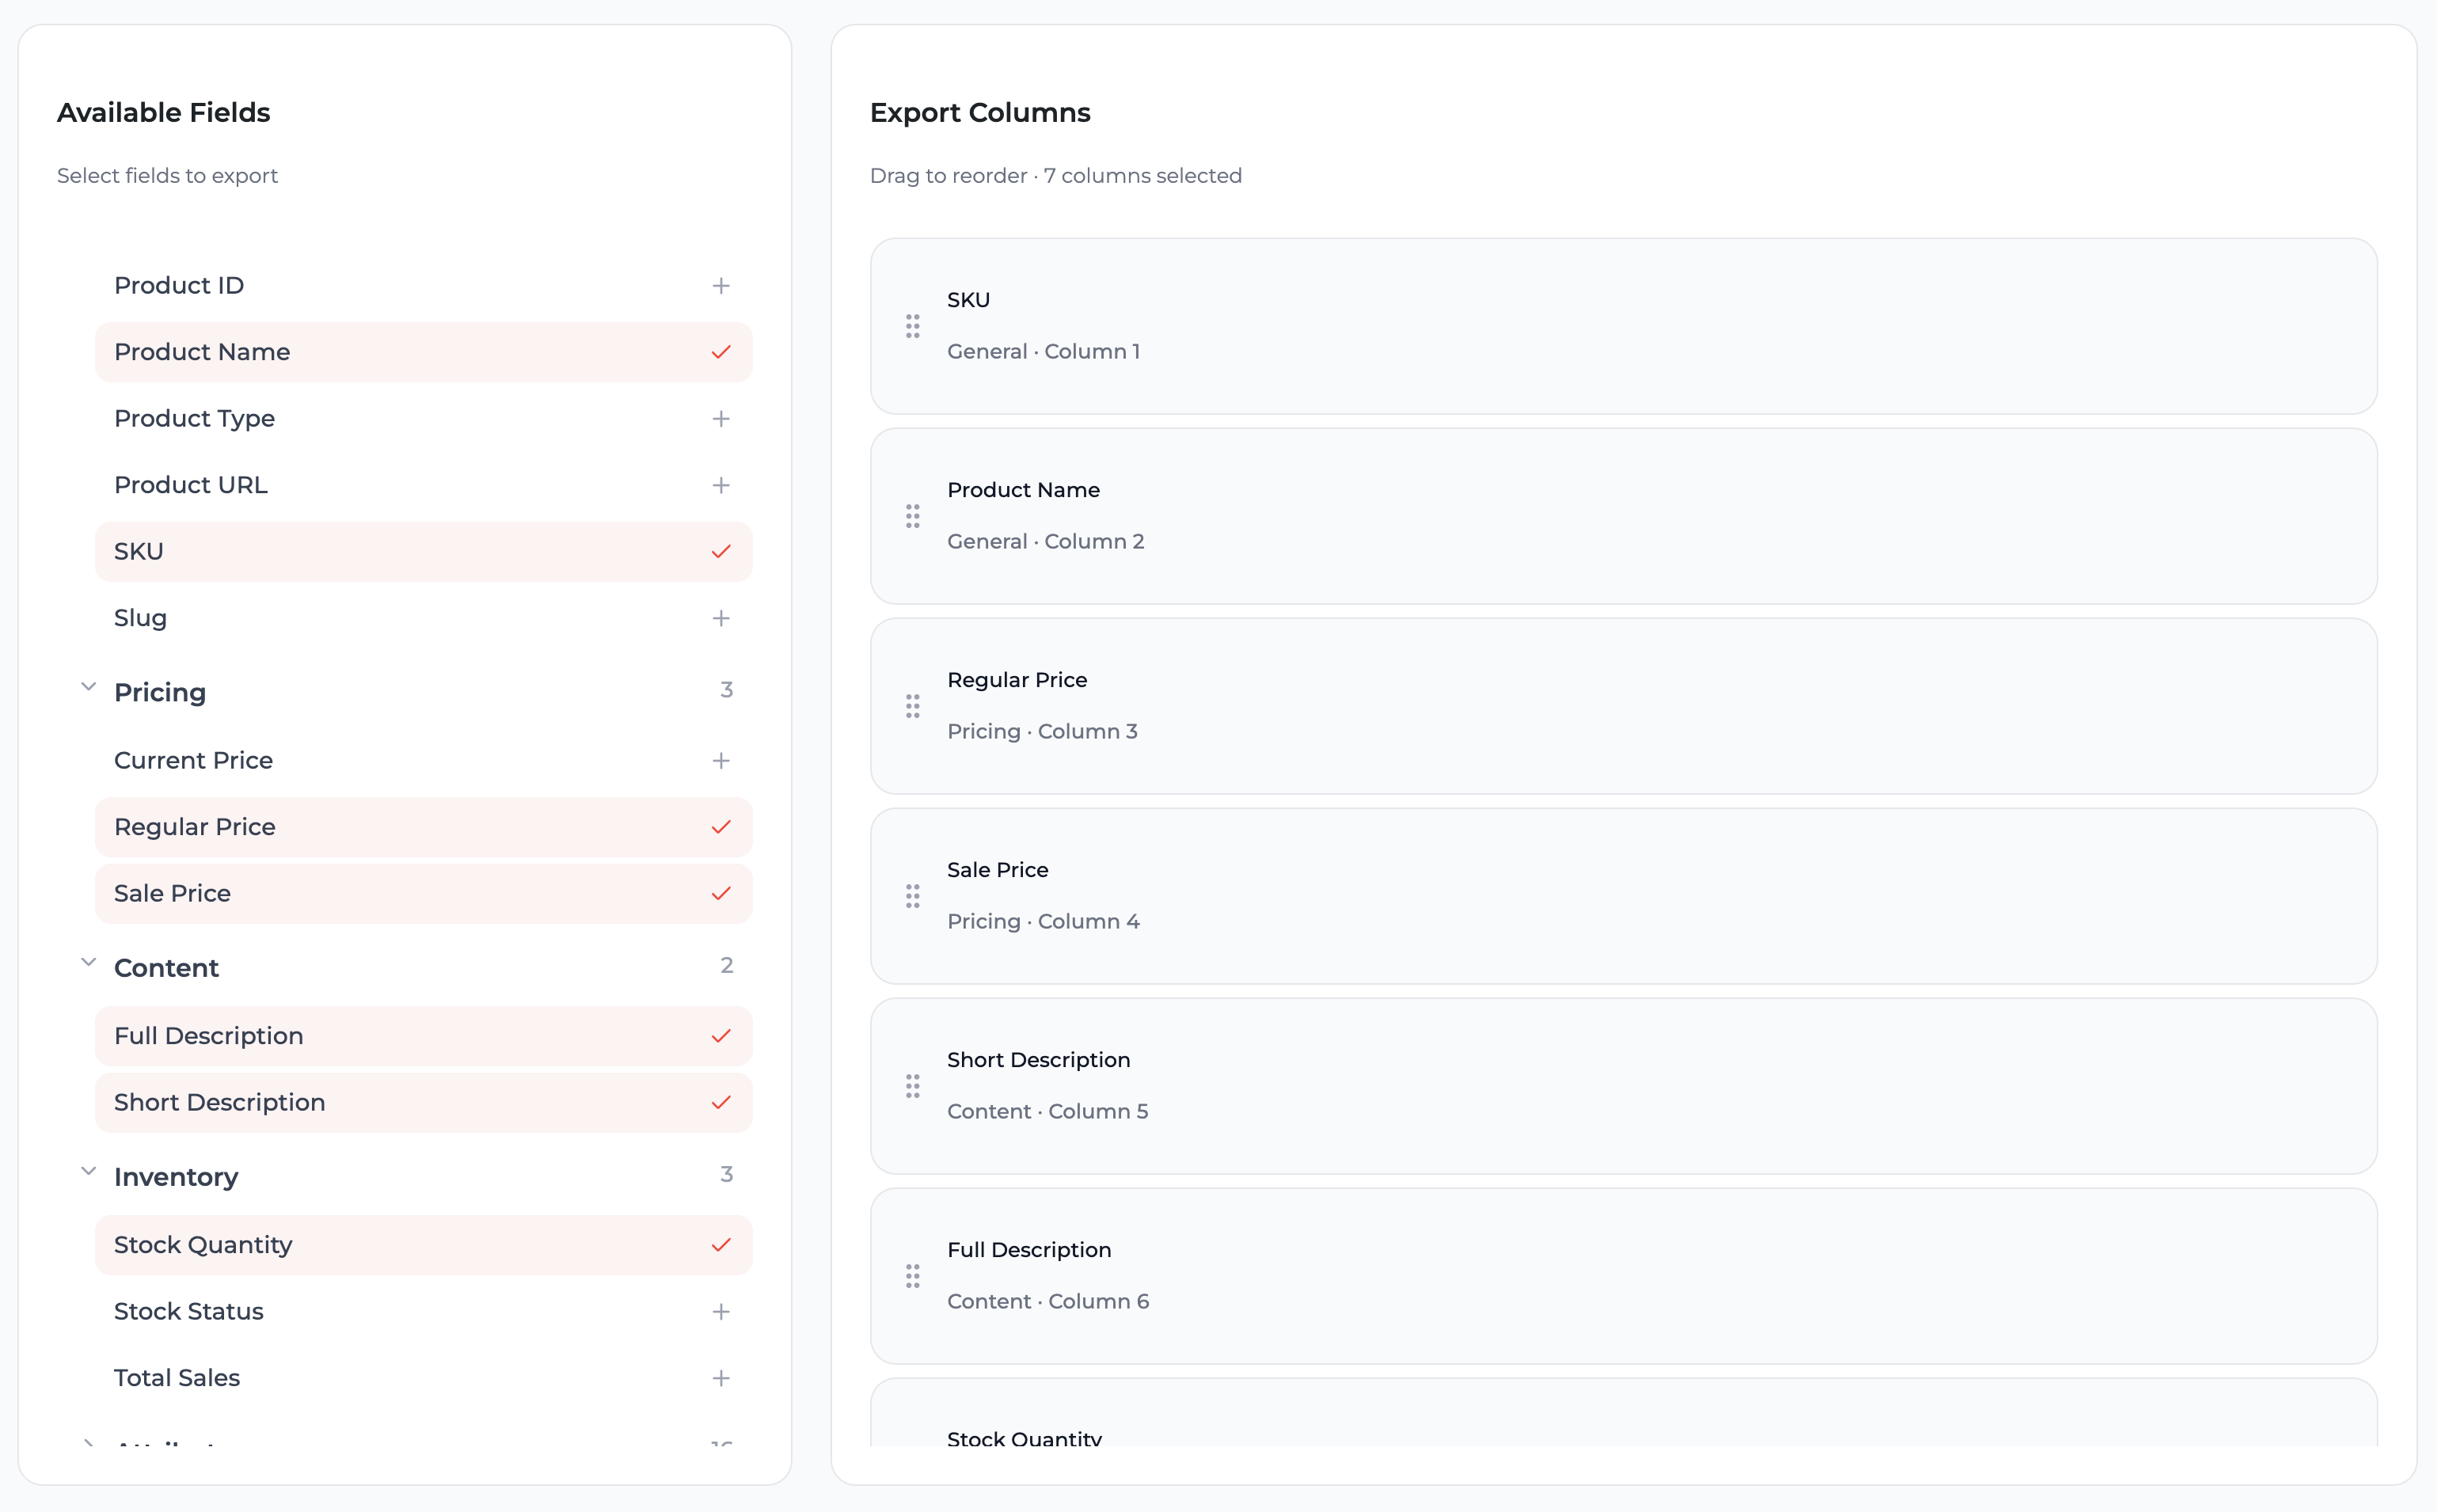
The left panel displays a list of available field groups. Expand a group to view individual fields.
When you click a field, it is added as a new export column. The center section (Export Columns / Builder) shows the current list of selected columns. You can remove columns and reorder them using drag & drop.
Available groups:
- Free General (ID, SKU, Name, Publish Status, Product Type, Catalog Visibility, Featured Product, etc.)
- Free Pricing (Current Price, Regular Price, Sale Price)
- Free Content (Full Description, Short Description, Slug)
- Free Inventory (Stock Quantity, Stock Management, Allow Backorders, Low Stock Threshold)
- Free Attributes (All global and local product attributes with their values)
- Free Taxonomies (Product Categories, Tags, Brands)
- Free Media (Featured Image URL, Gallery Image URLs)
- Pro Advanced Custom Fields (ACF) (All ACF field types)
- Pro Meta Fields (Any custom product meta fields)
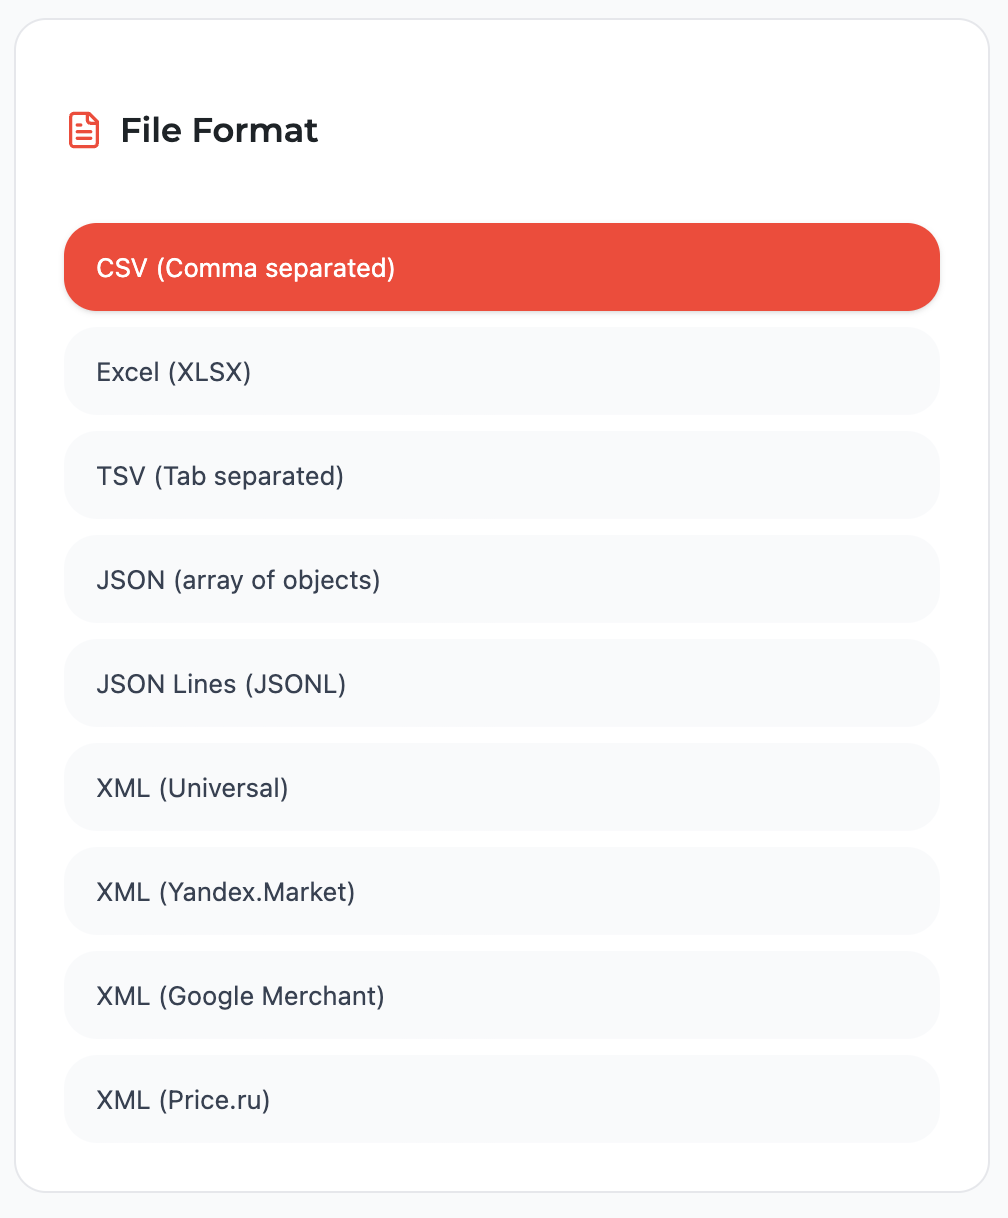
Step 2: Selecting Export File Format
In the right section of the screen, choose the export format:
- Free CSV (comma-separated, universal format for Excel, Google Sheets, 1C)
- Pro Excel (XLSX) (native Microsoft Excel format)
- Pro TSV (tab-separated)
- Pro JSON / JSON Lines (for developers and API integrations)
- Pro XML (universal, Yandex.Market, Google Merchant Center formats)
Step 3: Additional Options
- Pro Attach Product Images as ZIP Archive (all product images are downloaded into a separate archive)
Depending on your build, you may also see additional file settings here (for example: delimiter, encoding, and other formatting options).
Step 4: Product Filtering
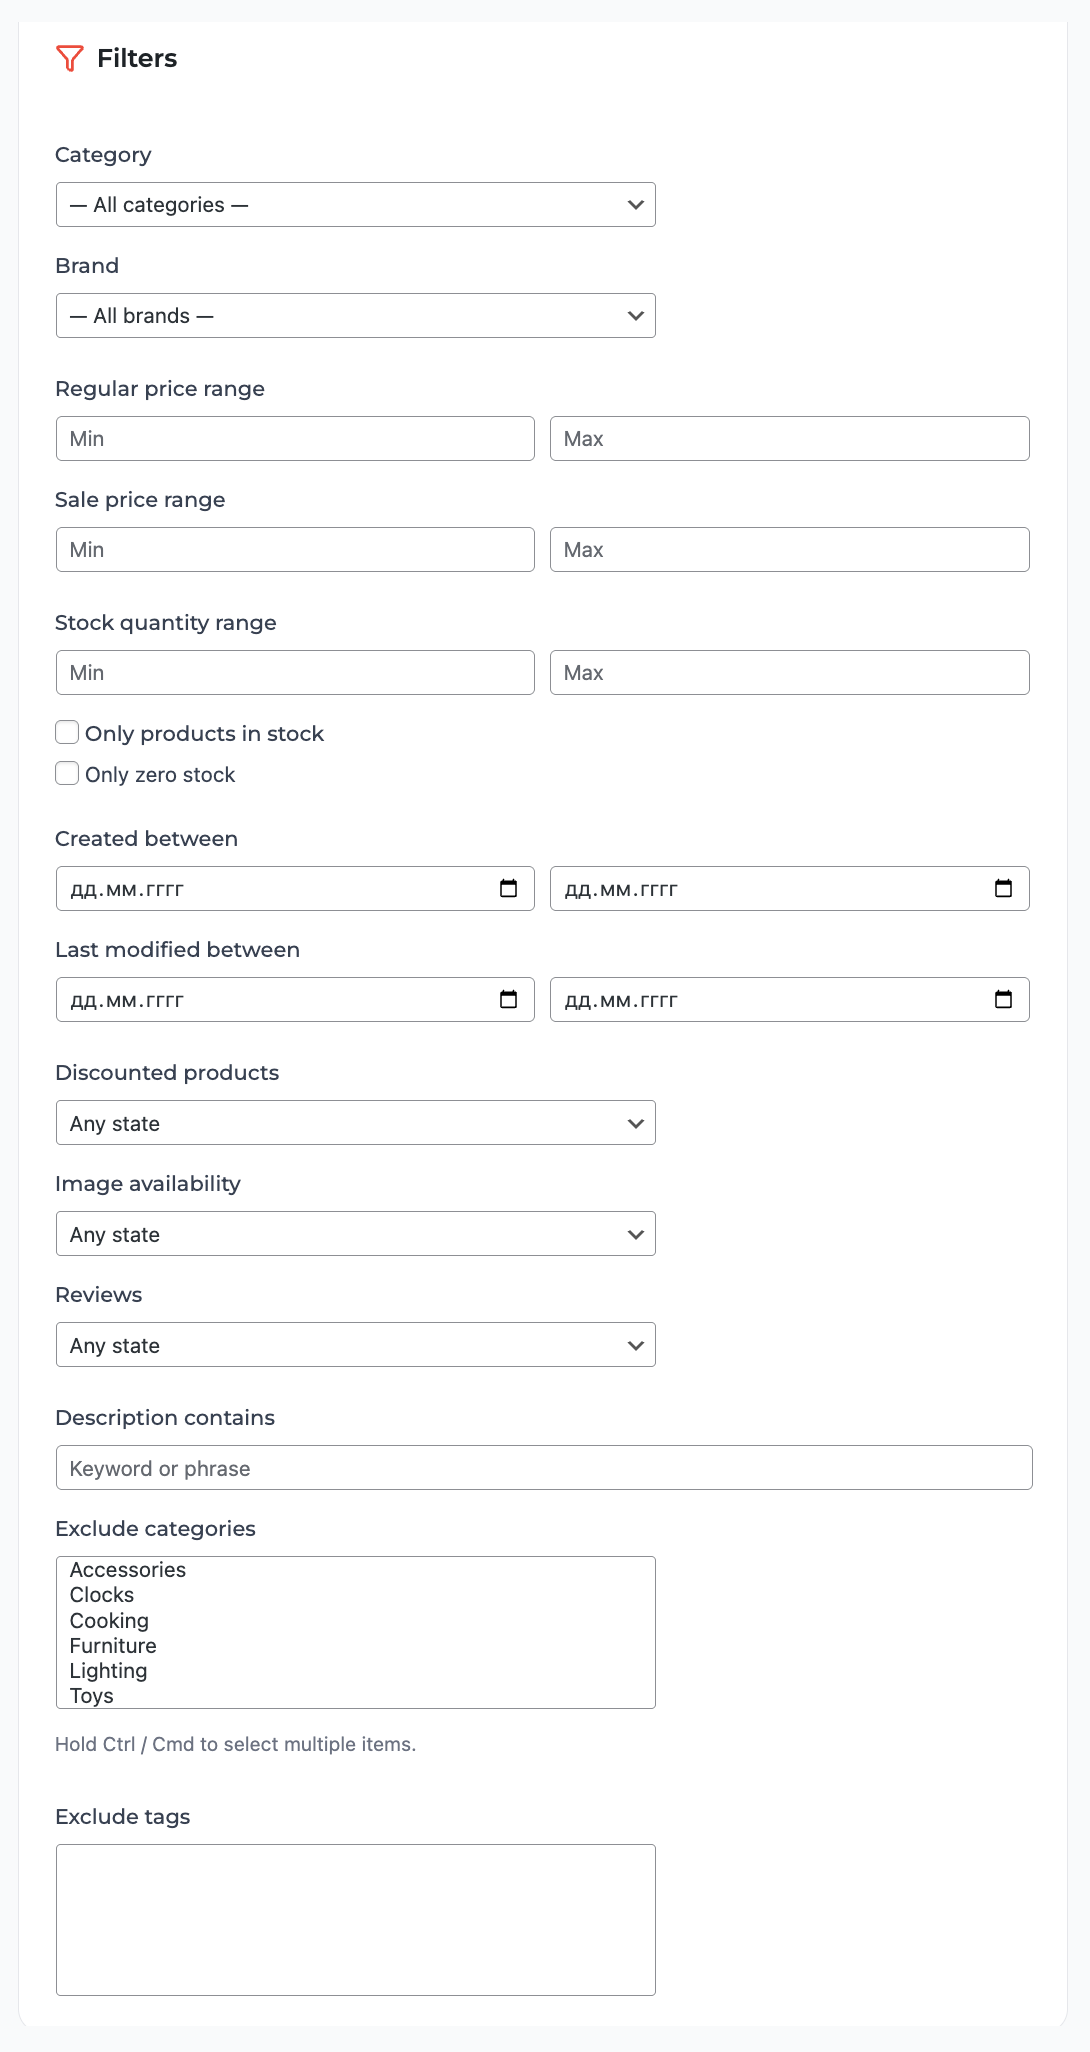
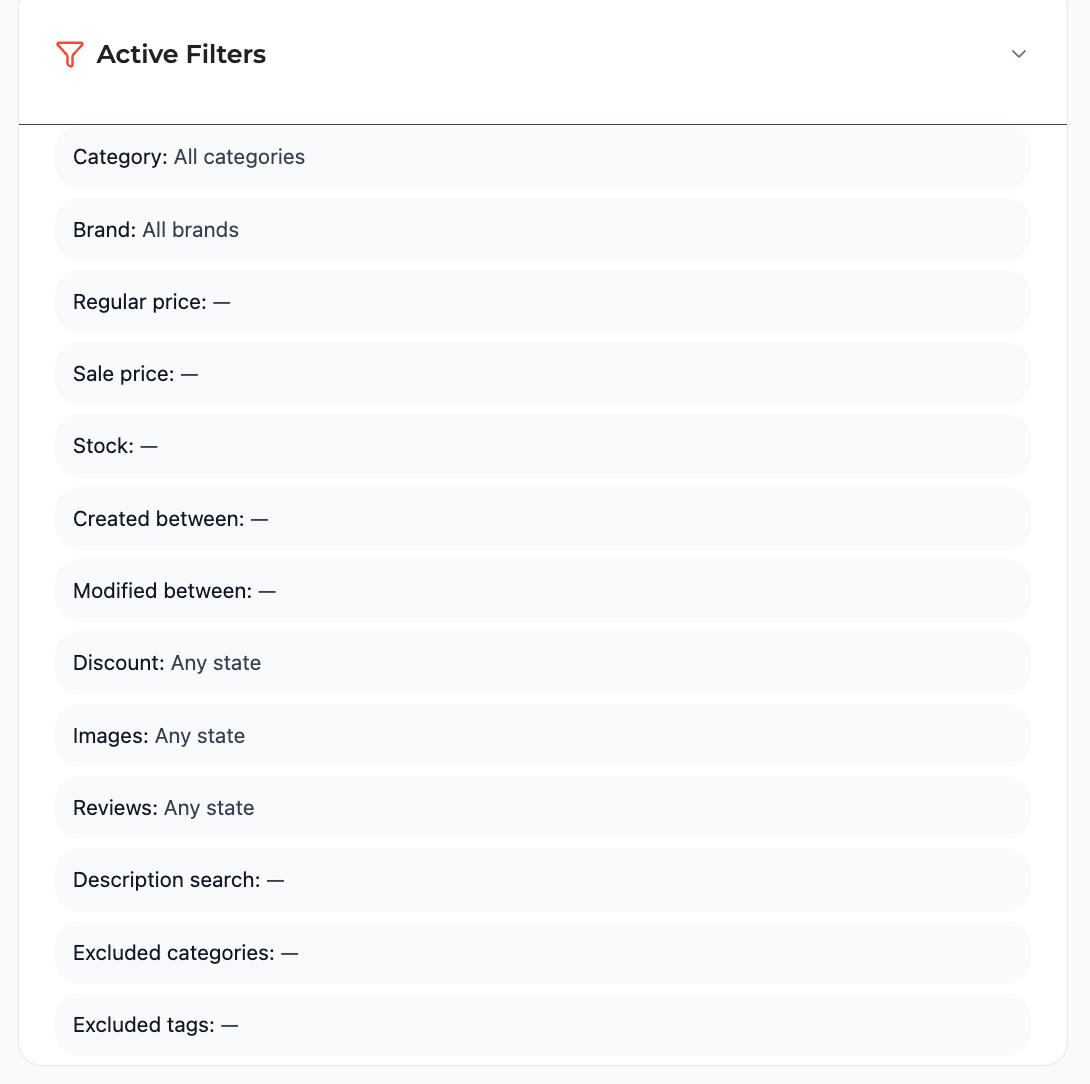
In the right section of the screen — the filter panel.
Filters available in Free:
- Free Category — select one or multiple categories
- Free Brand — filter by brands
- Free Regular Price Range — "from/to" fields
- Free Sale Price Range — "from/to" fields
- Free Stock Quantity Range — "from/to" fields
Available advanced filters in Pro:
- Pro Only products in stock
- Pro Created between — product creation date range
- Pro Last modified between — product last modification date range
- Pro Discounted products
- Pro Image availability
- Pro Exclude categories / tags
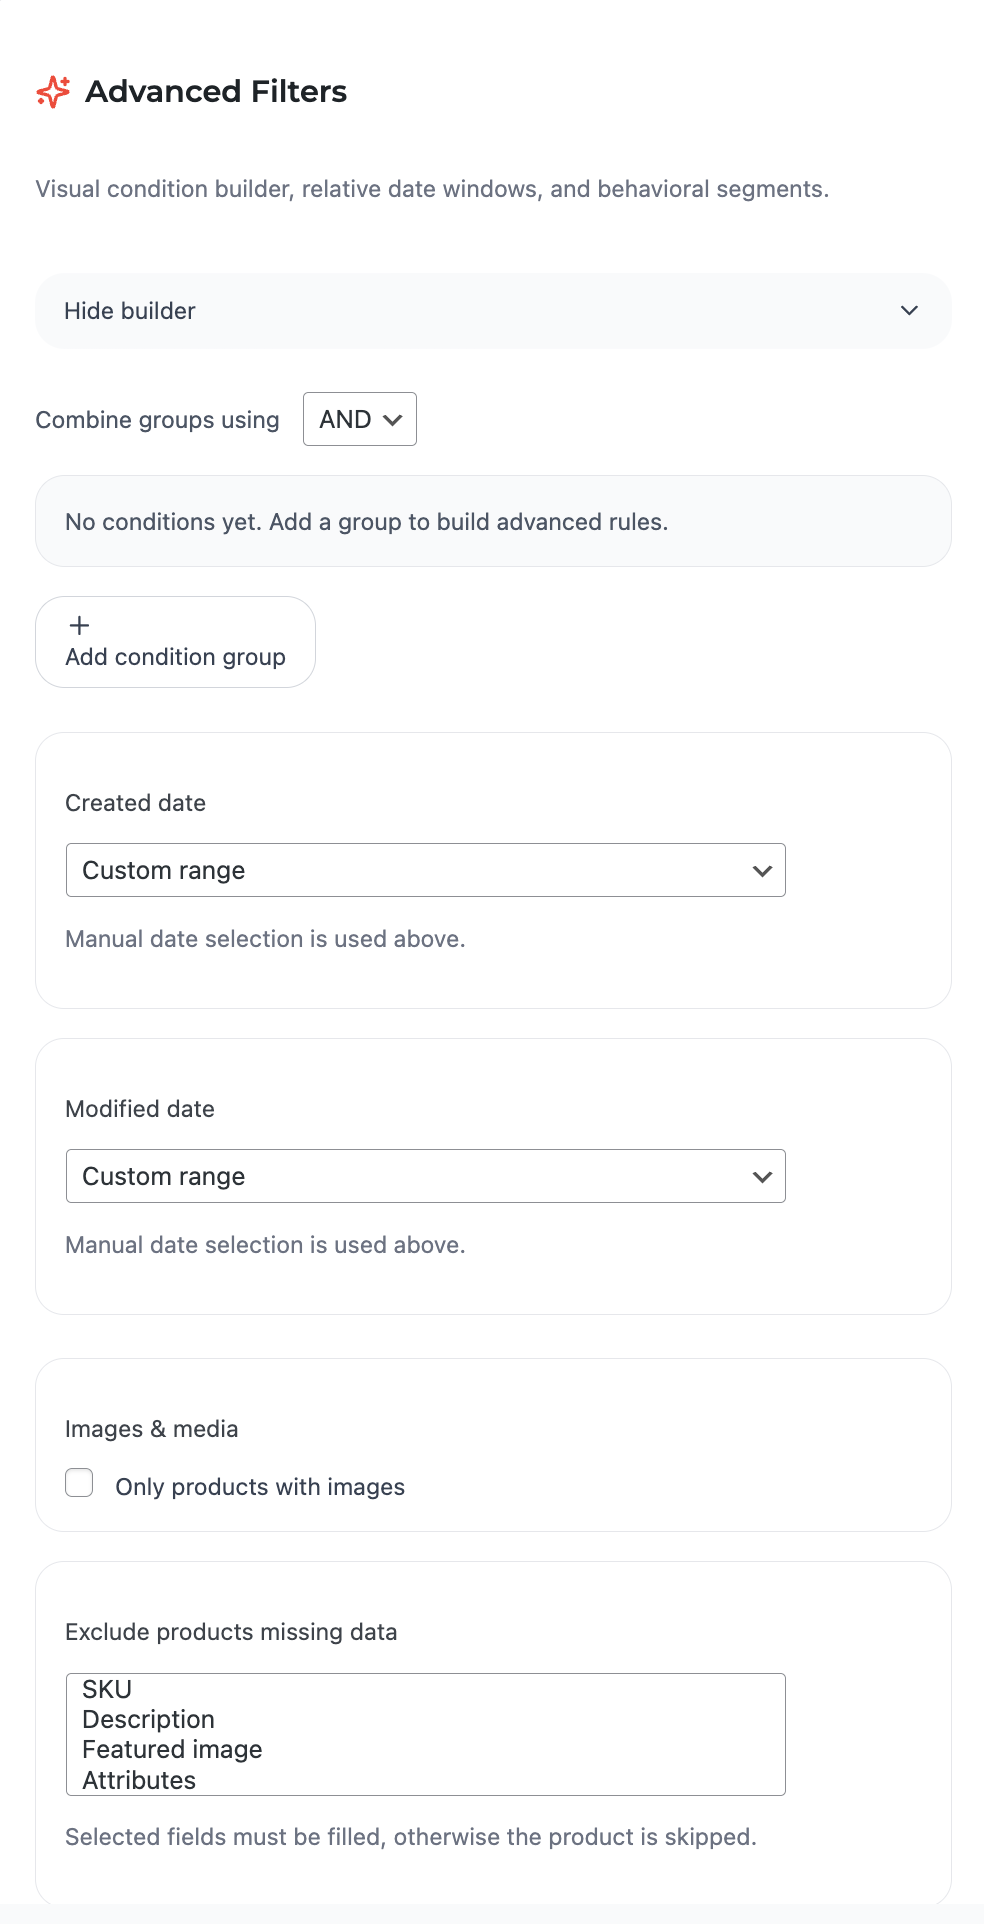
Step 5: Advanced Filters — Extended Filtering
Pro onlyIn the Free version, the entire block is blurred + PRO icon. In Pro, the Advanced Filters block opens fully, providing powerful precise product segmentation capabilities.
Visual Condition Builder:
- The + Add condition group button adds a new condition group with AND/OR logic between groups.
- Within each group, add unlimited conditions (field + operator + value).
- Available fields for conditions: prices, stock, dates, attributes, meta fields, etc.
- Operators: =, ≠, >, <, ≥, ≤, contains, starts with, ends with, is empty, is not empty.
Step 6: Preview, Save Template, Export Now (Bottom Action Bar)
At the bottom of the Quick Export screen you will always see the Ready to export area with the number of selected columns.
- Preview — opens the Data Preview modal (loads the first N rows) so you can verify columns, filters, and formatting. The modal includes an Export Now button to start the export.
- Preview may be disabled if no columns are selected, or if preview is disabled in your build.
- Save as Template — saves the current configuration (fields, filters, and file settings) as a reusable template for the Templates tab.
- Export Now — starts the export. While the export is running, the button becomes disabled and shows Exporting… with a loader icon.
Step 7: Reset Settings
Free- Click the Reset button in the top-right corner of the screen.
- All selected fields, custom headers, column order, basic and advanced filters revert to default values.
Step 8: Export Modal — Progress, Status, and Download
Free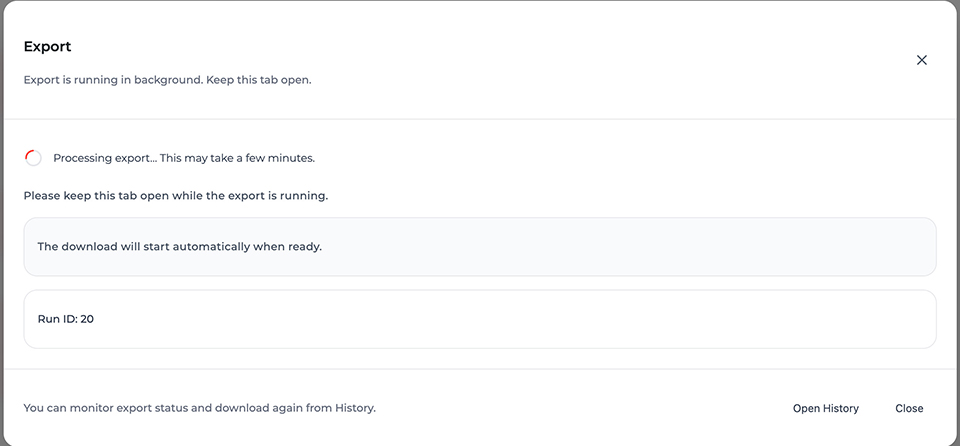
After you click Export Now, the plugin opens the Export modal. This modal shows progress and status messages, and the download should start automatically when ready.
Status messages you may see:
- Starting export…
- Export is running in background. Keep this tab open.
- Export is running. Download will start automatically.
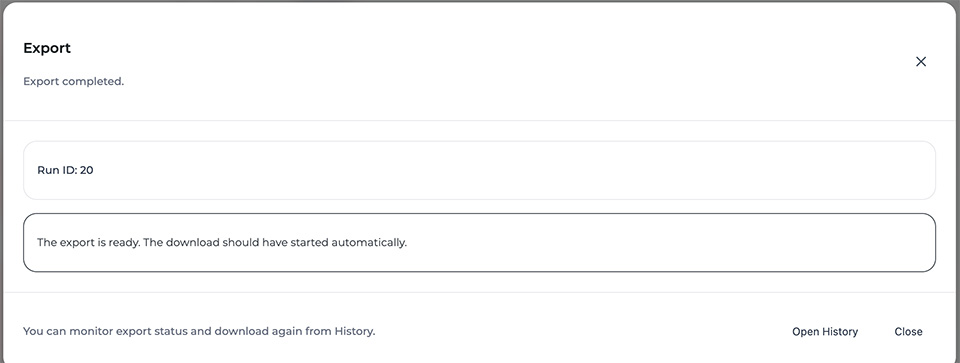
- Export completed.
- Export failed.
During processing you may see: “Processing export… This may take a few minutes.” This is normal for large catalogs. Keep the tab open while the export is running.
Warning: Sometimes exports continue in background but status updates or automatic download may be blocked by your hosting / firewall. In that case use Open History to download the result.
If the server provides a Run ID, it is displayed inside the modal. This is useful for support and diagnostics.
Modal footer buttons:
- Copy diagnostics — appears only in warning scenarios and copies diagnostic info for support.
- Open History — opens the History tab where you can monitor runs and download again later.
- Close — closes the modal and resets its state.
If the export completed but the file did not download automatically, open History, find the latest run, and download again. This is a common scenario for large files or restricted hosting environments.
Step 9: Saving a Template
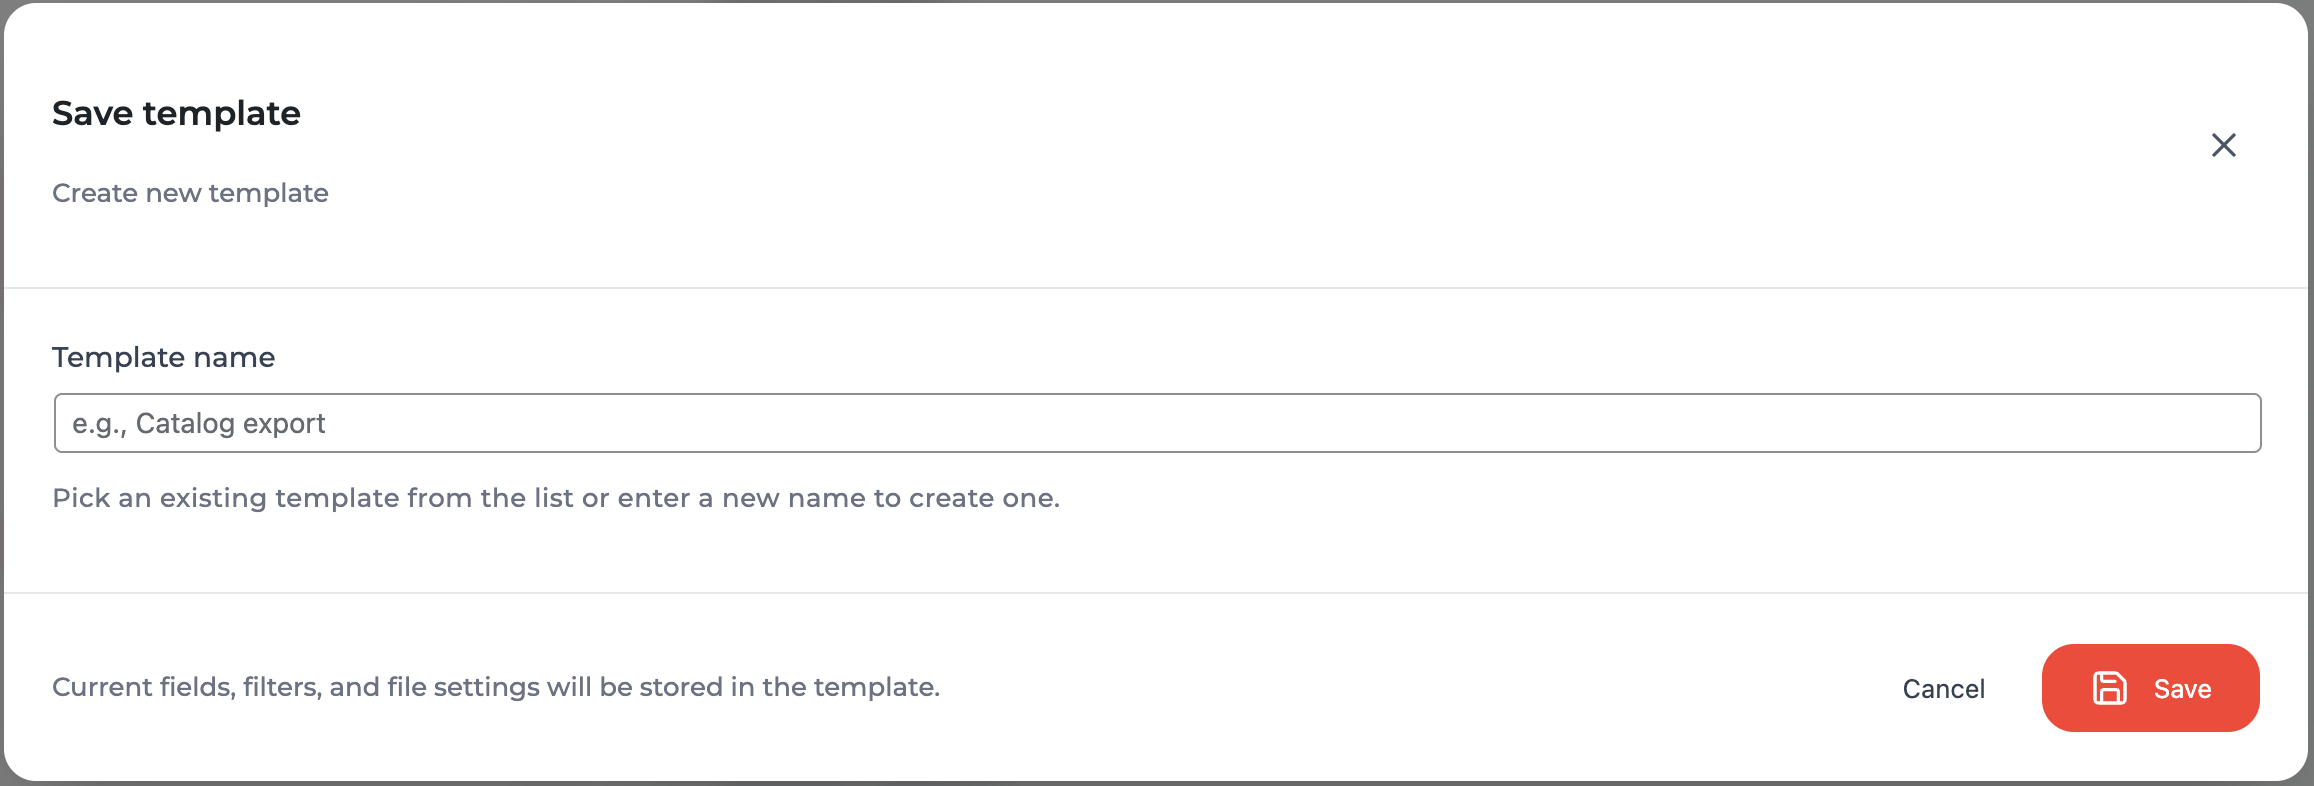
- After configuration, click Save as Template (top of the screen).
- Enter a template name and optional description.
- The template saves all fields, order, headers, basic and advanced filters, and format.
- Free Only 1 template is allowed.
2. Export Templates — Template Management
This page is designed for viewing, editing, and managing saved export templates.
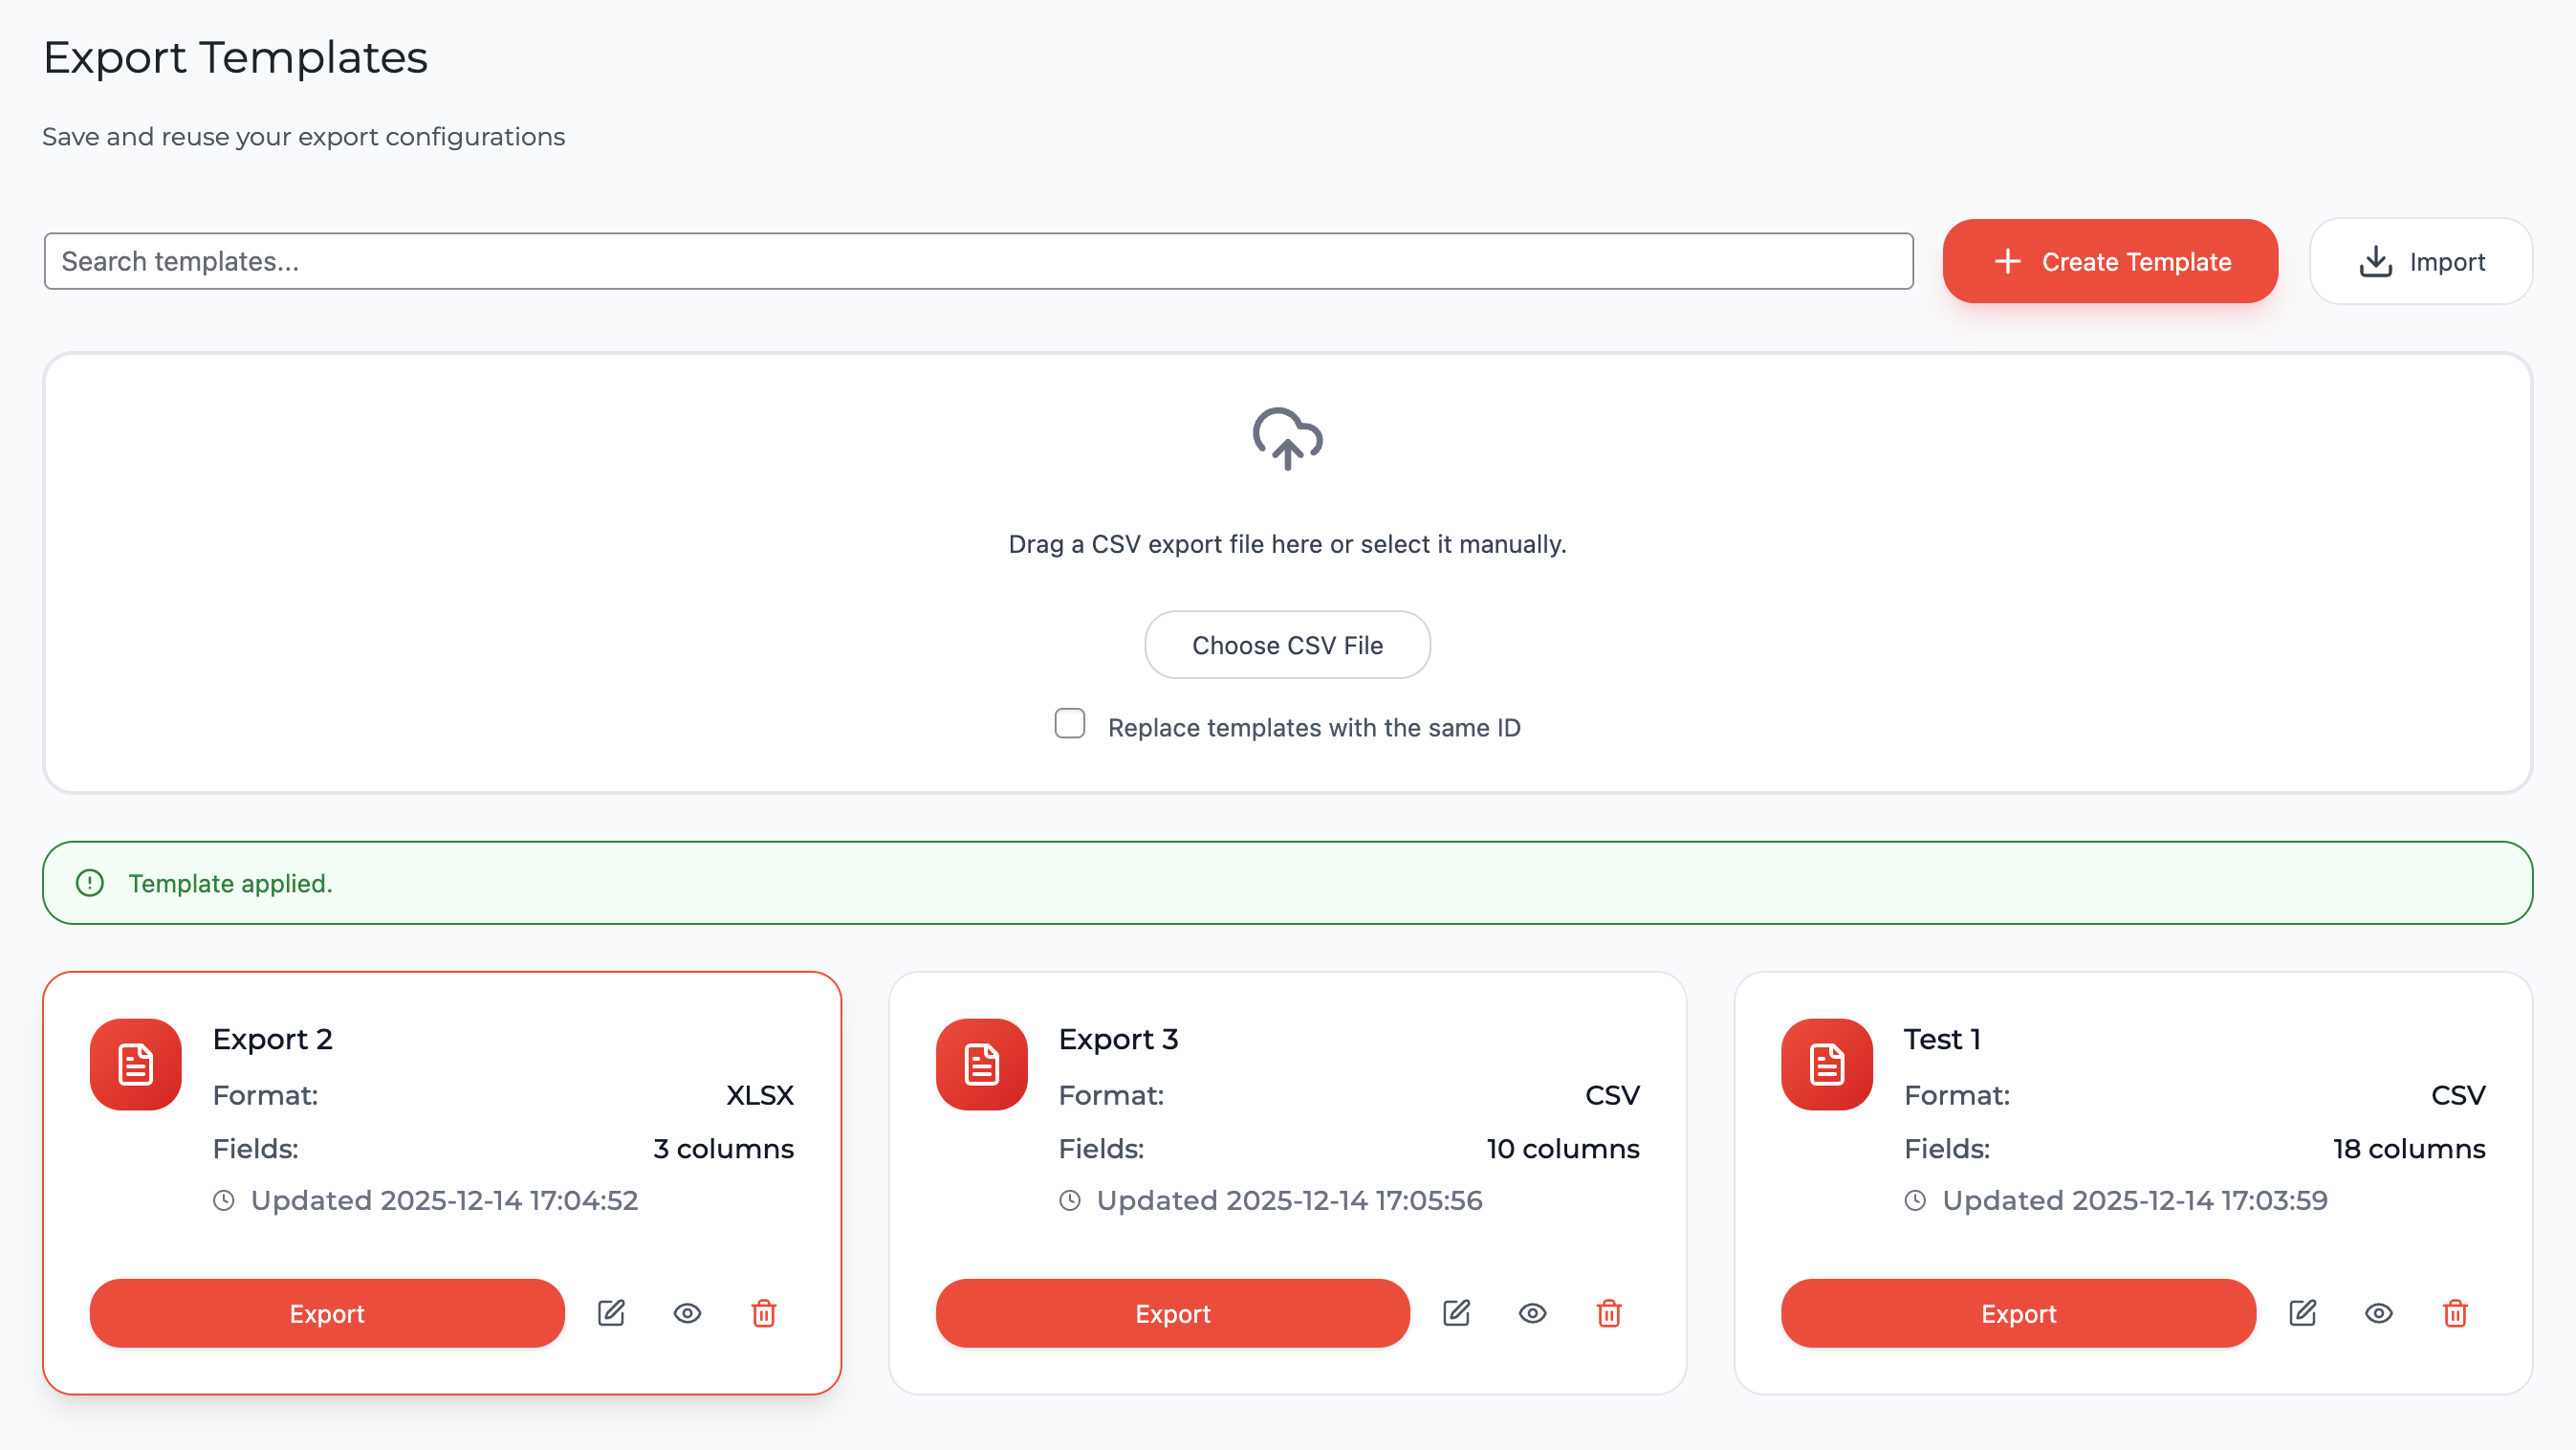
- Free Displays a list of all saved templates as cards (name, file format, field count, last updated date) — only 1 template in Free
-
Actions available for each card:
- Export — immediate export using the template
- Edit — load template settings into Quick Export for editing
- Preview — preview the first rows based on the template
- Delete — delete the template
- Pro Unlimited number of templates + template import/export in JSON (for transfer between sites)
3. Automations — Scheduled Exports
Pro only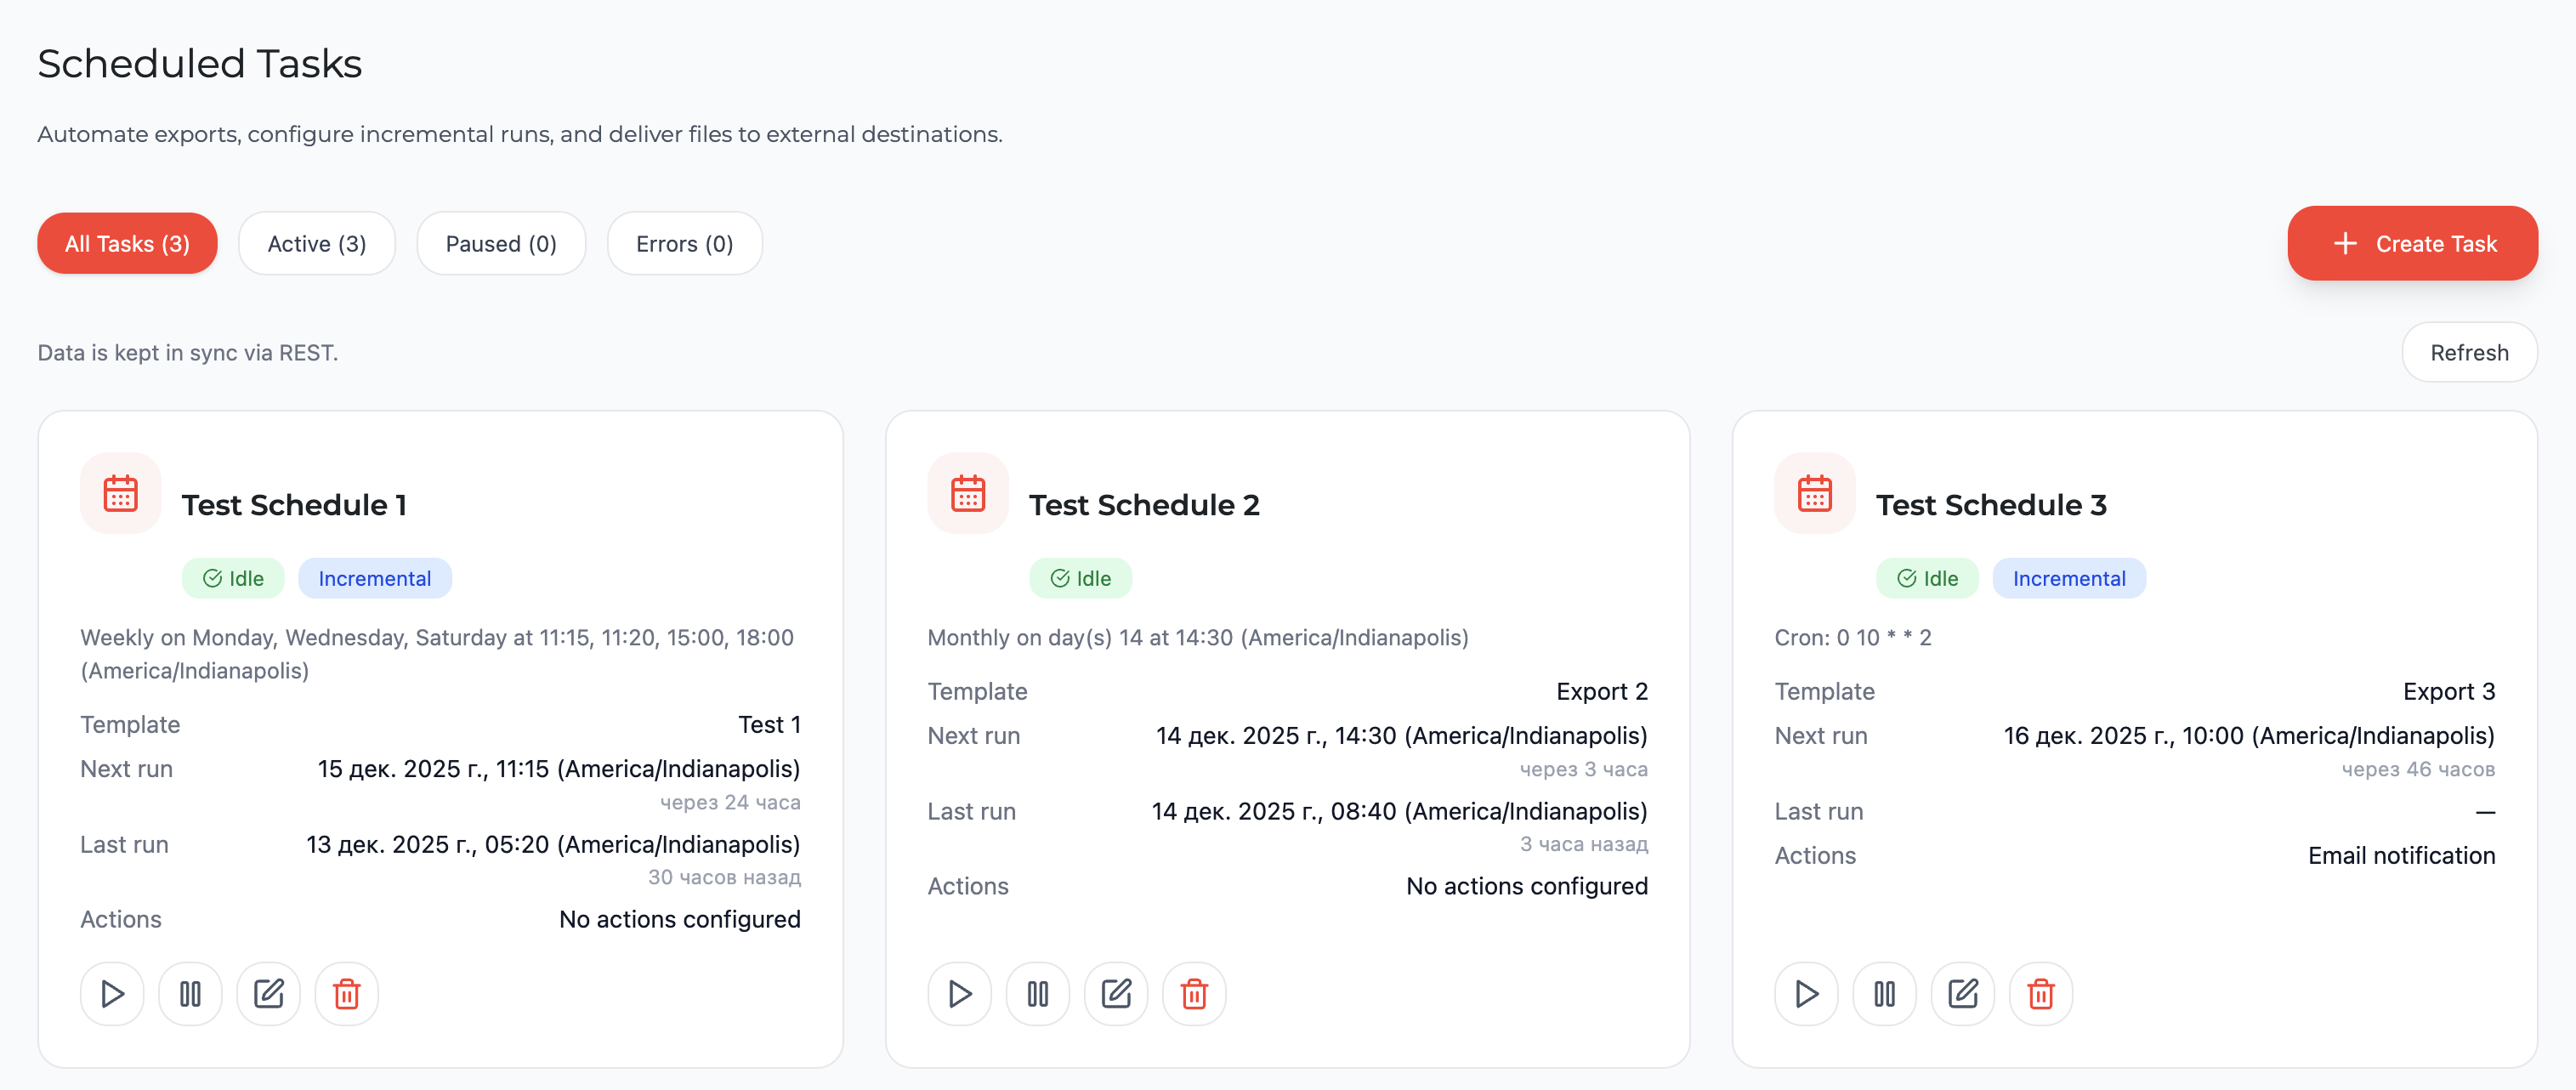
In the Free version, the tab is hidden and replaced with a placeholder featuring a PRO icon and the text "Automations are available in Pro version."
In Pro:
- Create a new scheduled task
- Select a saved export template
- Configure schedule (daily at specific time, weekly by days, monthly, custom cron expression)
- Enable incremental export (only products changed since the last run are exported)
-
Configure one or multiple post-export actions:
- Send file to one or more emails
- Upload via FTP or SFTP (with saved connection profiles)
- Upload to cloud storage (Google Drive, Dropbox, AWS S3, Yandex.Disk)
- Execute webhook (POST request with export details)
- Manage tasks: enable/pause, run manually, delete
- View separate run history for each task
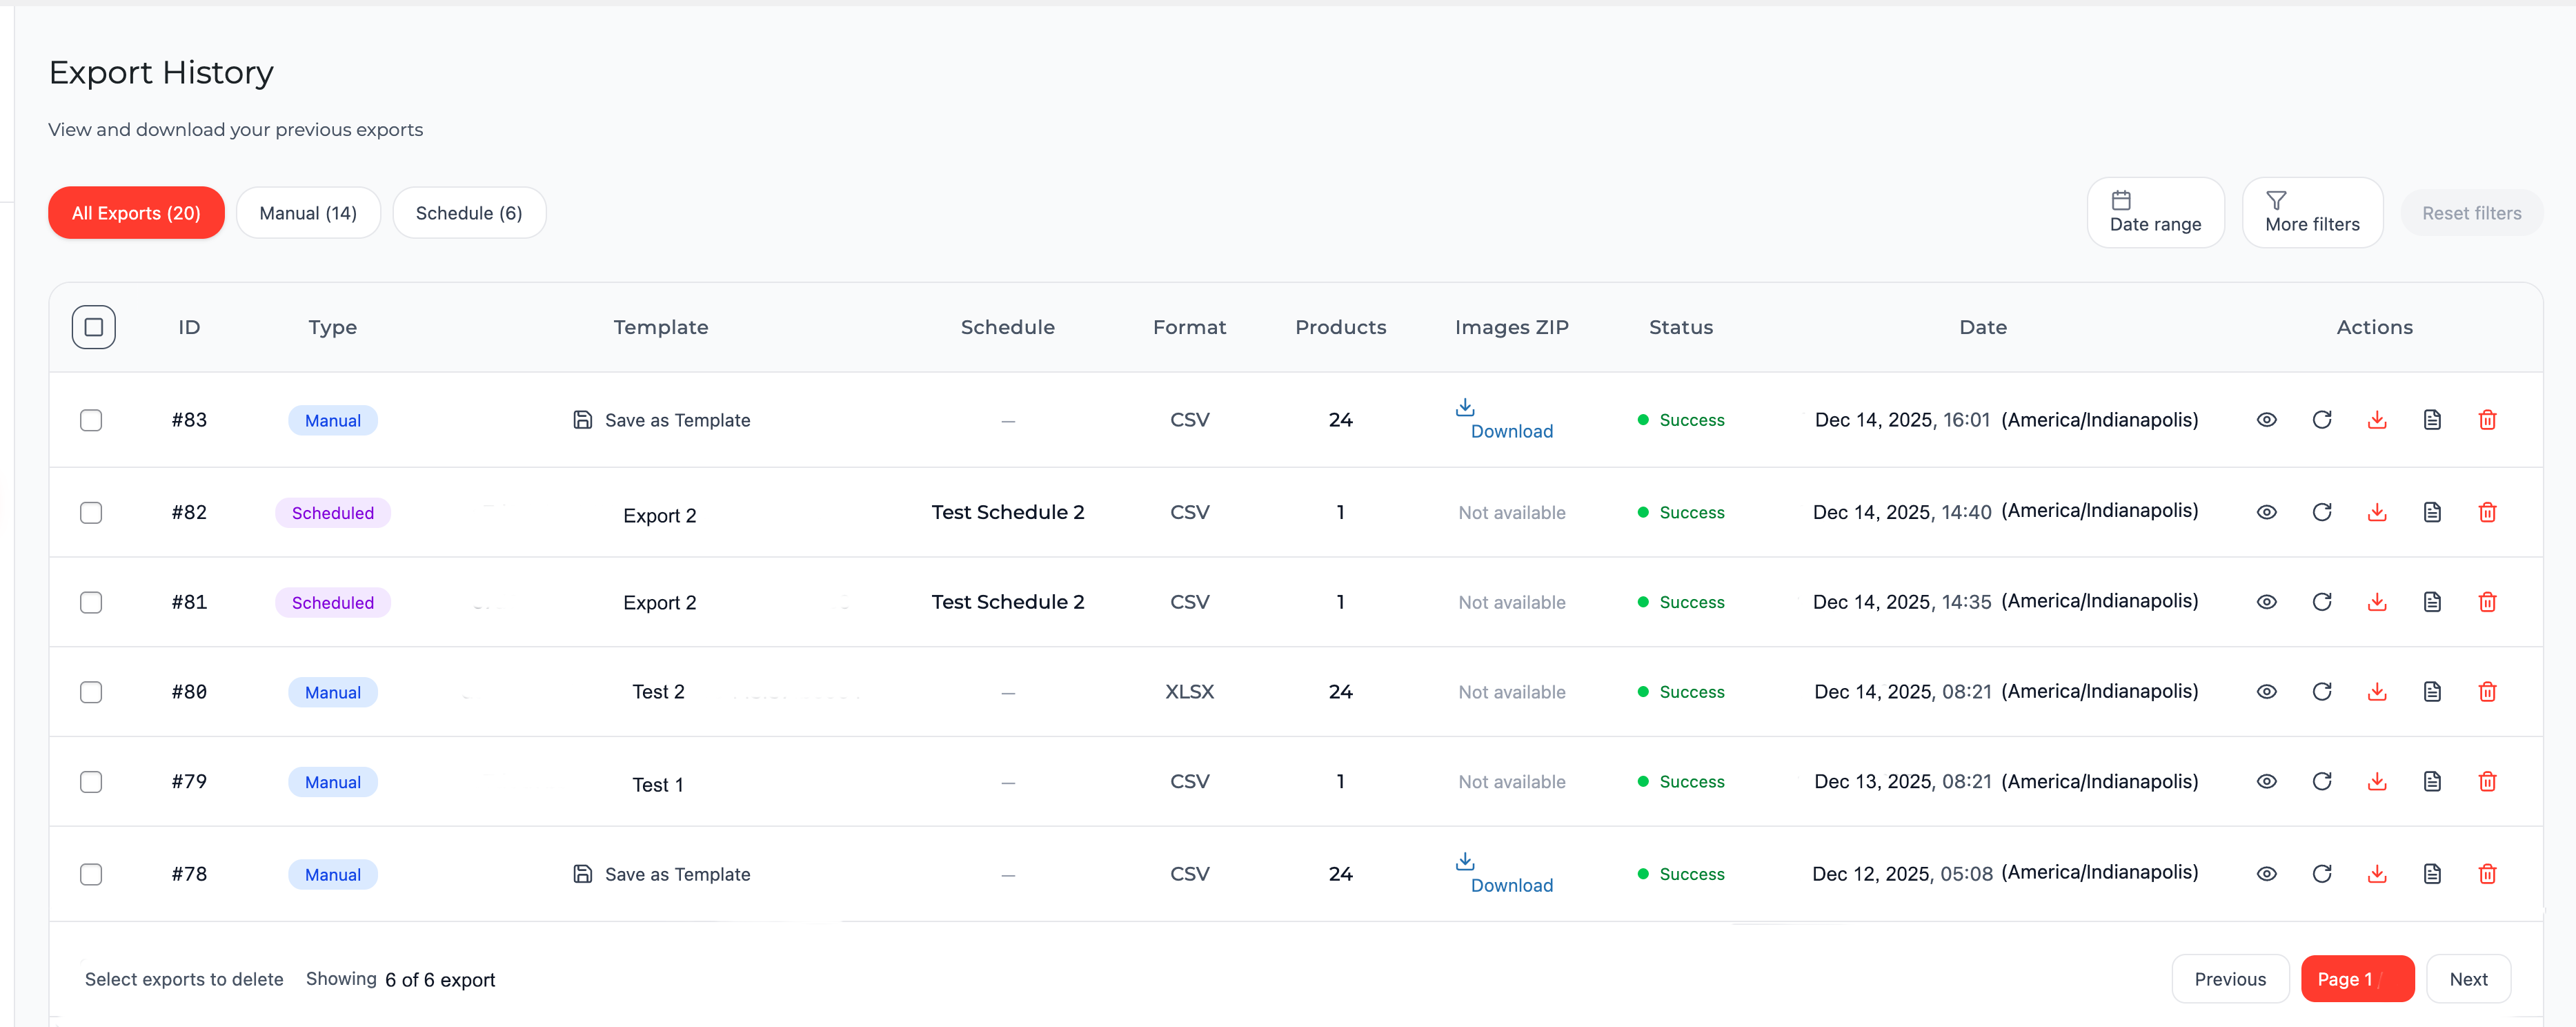
4. History — Export History
The page displays a chronological list of all completed exports (manual and scheduled).
In Free version:
- Only the most recent 12 runs (manual and scheduled) are displayed.
- Below the table, a notification appears: "12 of 12 exports shown" + PRO icon + "Upgrade to Pro for unlimited history."
In Pro version:
- Full unlimited history of all exports with no record limit.
- Advanced filters (by status, run type, template, schedule, dates, and other parameters).
-
Actions per entry:
- Download main export file
- Download ZIP archive of images (if the option was enabled)
- Re-run export with identical settings
- View detailed execution log
- Save entry settings as a new template
- Delete entry
5. Media Export — Media File Export
Pro only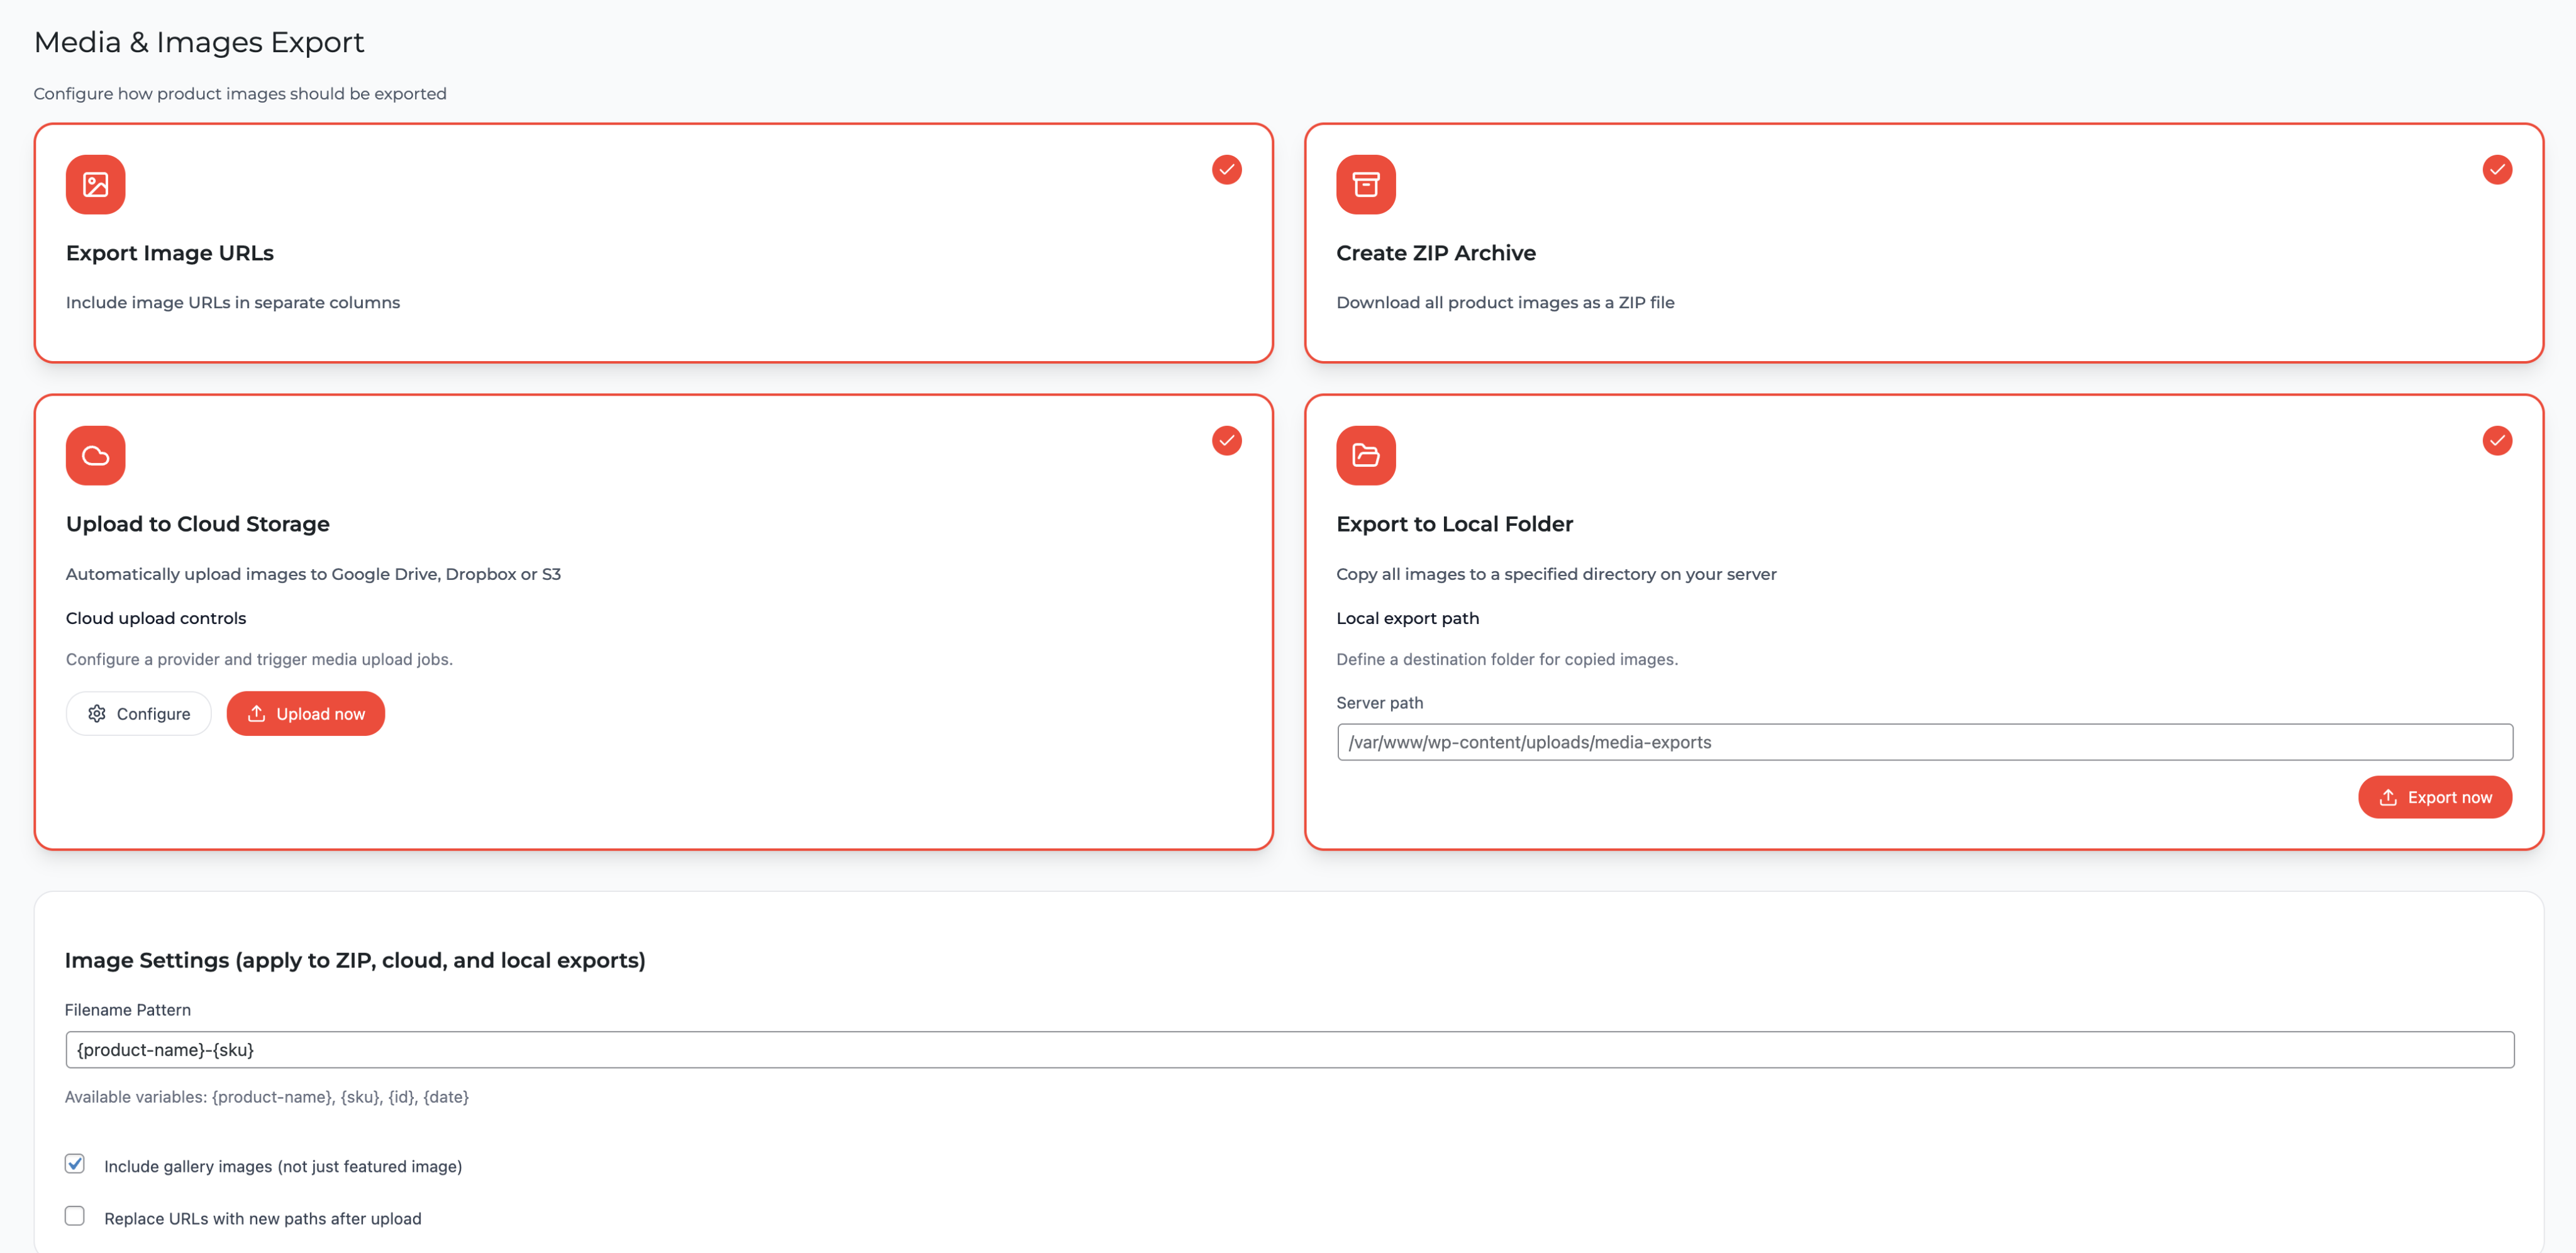
In the Free version, the tab is hidden with a placeholder and PRO icon.
In Pro:
-
Select media export mode:
- Export Image URLs — include image URLs in separate columns
- Create ZIP Archive — download all product images as a ZIP file
- Upload to Cloud Storage — automatically upload images to Google Drive, Dropbox or S3
- Export to Local Folder — copy all images to a specified directory on your server
- Configure Filename Pattern
6. Settings — Plugin Settings
General
FreeGeneral parameters: default format, file name template, CSV delimiter, encoding, etc.
Multilingual
ProExport of product translations for WPML or Polylang (separate columns or files per language)
Database
ProCleanup of old history records, plugin table optimization
Notifications
ProEmail notification configuration for export completion or errors
License
ProLicense key entry and activation, domain management, subscription status
Advanced
ProDetailed logging enablement, chunk configuration, memory limits, debug options
Access control
ProFlexible permission configuration for different user roles (who can export, manage templates, schedules, etc.)
7. Help / Docs — Help and Documentation
Available in both versions:
- Quick start with step-by-step instructions
- Video tutorials for core features
- Full text documentation
- System diagnostics (WP, WC, PHP versions, memory)
- Feedback form and support
Ready to streamline your WooCommerce exports?
Get started with Product Exporter today!